

How to create MediaWiki website
MediaWiki is free wiki software that can be used to create an encyclopedia, a reference website, a corporate knowledge base, an online journal, or a thematic website with collaborative editing. The software is free, but a working public project still requires proper server configuration, regular updates and backups.
This article describes how to install, configure and maintain a website based on MediaWiki. Questions, additions and comments about MediaWiki can be left on the talk page.
About MediaWiki
MediaWiki is free and open-source software written mainly in PHP. It implements a hypertext wiki environment and was originally created as the engine for Wikipedia. Today MediaWiki is used by Wikimedia Foundation projects and by many independent websites.[1]
MediaWiki is a popular platform for article-based and information websites because it has page history, categories, namespaces, templates, file uploads, user rights and an extension system. The interface has been translated into many languages, so it is suitable for multilingual projects and international communities.
MediaWiki is not a simple static site builder. It is better suited to projects where pages are constantly edited, linked, categorized and improved by several contributors over time.
Installing MediaWiki
Before installation, decide what type of site you want to build: a public encyclopedia, a closed knowledge base, a multilingual project, a file repository, or a compact reference website. This affects user rights, the set of extensions, the backup strategy and hosting requirements.
A typical MediaWiki installation requires Apache or Nginx, PHP, a database such as MariaDB/MySQL, PostgreSQL or SQLite, and access to website files and the database. Before installing, always check the current requirements for the version you plan to use, because PHP and PHP extension requirements change from version to version.[2]
Basic installation process:
- Check the official server requirements.
- Download a stable MediaWiki release from the official download page.
- Create a database and a database user.
- Upload MediaWiki files to the server using FTP/SFTP or SSH.
- Open the website in a browser and run the installation wizard.
- Save the generated `LocalSettings.php` file and upload it to the MediaWiki root directory.
- Test the main page, login, page creation and file uploads.
Installation through the web installer
After uploading the files to the server, open the website domain in a browser. If MediaWiki has not been configured yet, the installer link will appear. The installation wizard checks the environment, asks for the interface language, connects to the database, sets the site name, creates the administrator account and offers basic configuration options.[3]
At the database step, specify the database type, database name, user and password. These values are usually created in the hosting panel, phpMyAdmin or through the terminal. If the installer reports a database connection error, the most common causes are an incorrect database name, insufficient user rights, a wrong database host, or a missing PHP extension.
After the installation is complete, MediaWiki offers to download `LocalSettings.php`. This is the main configuration file of the website: it stores database connection settings, site name, skin, enabled extensions, user rights and other options. The file must be uploaded to the directory where MediaWiki's `index.php` is located. After installation, you can start creating pages and articles.
Basic configuration after installation
Most important settings are stored in `LocalSettings.php`. Before changing this file, make a backup copy, because a PHP syntax error can temporarily break the site.
Common post-installation settings include:
- site name and public URLs;
- file uploads and allowed file types;
- rights for anonymous and registered users;
- email sending;
- default skin;
- short URLs for pages;
- caching and performance;
- backups of files and database.
Example of enabling file uploads:
$wgEnableUploads = true;
Example of choosing the default skin:
$wgDefaultSkin = "vector-2022";
MediaWiki skins
A visual theme in MediaWiki is called a skin. The standard modern option is Vector 2022. Other skins include Vector legacy, MonoBook, Timeless, MinervaNeue for mobile display, and many others.[4]
A skin is usually installed in the `skins` directory and then loaded from `LocalSettings.php`. Each skin page on MediaWiki.org has its own installation and compatibility instructions.
Example of loading a skin:
wfLoadSkin( 'Vector' );
$wgDefaultSkin = 'vector-2022';
If a skin does not appear, check the folder name, loading line, file permissions and compatibility with the installed MediaWiki version.
-
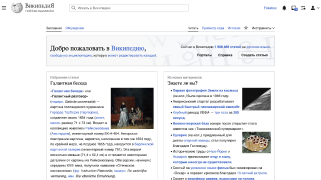 Vector 2022
 -
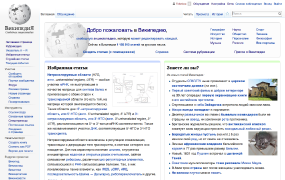 Vector legacy
 -
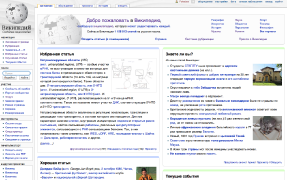 MonoBook
 -
 Modern
 -
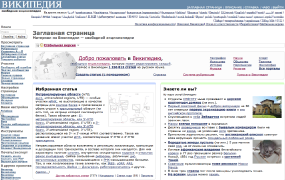 Cologne Blue


MediaWiki extensions
Extensions add new features to MediaWiki: visual editing, maps, parser functions, semantic data, spam protection, file handling, forms, forums and many other tools. The extension catalog is available on the official MediaWiki website.[5]
General extension installation process:
- download a version compatible with your MediaWiki version;
- upload the extension folder to the `extensions` directory;
- add the loading line to `LocalSettings.php`;
- run database updates if required;
- check `Special:Version`.
Typical loading example:
wfLoadExtension( 'ParserFunctions' );
Some extensions require additional services, Composer dependencies or separate permission settings. Therefore, read the documentation for each specific extension instead of copying loading lines from old instructions.
Short URLs
By default, MediaWiki pages may open through addresses such as `/index.php?title=Page_title`. For a public website, shorter addresses such as `/wiki/Page_title` are usually more convenient. Short URL setup depends on the web server and must match `$wgScriptPath` and `$wgArticlePath` in `LocalSettings.php`.[6]
Example settings in `LocalSettings.php`:
$wgScriptPath = "/w";
$wgArticlePath = "/wiki/$1";
These settings alone are not enough: Apache or Nginx also need rewrite rules at the web-server level. For a new website, it is better to choose the final URL scheme immediately, because changing URLs after publication requires redirects.
Updating MediaWiki
MediaWiki should be updated regularly: updates fix security issues, bugs and compatibility problems with modern PHP versions. Before updating, always check the requirements of the new version and the compatibility of installed extensions and skins.[7]
Minimum safe preparation:
- make a database backup;
- make a file backup, especially `LocalSettings.php`, `images`, `extensions`, `skins` and custom files;
- check requirements for the new MediaWiki version;
- prepare compatible versions of extensions and skins;
- if possible, test the update on a copy of the site first.
Updating through the browser
MediaWiki supports web-based updating through the `mw-config` directory, but this method should be used carefully on production websites. It is convenient on simple hosting without SSH access, but it is less suitable for large projects because the process may be interrupted by PHP time limits or memory limits.
If browser-based updating is used, make a full backup first and make sure you know the database connection details. After the update, check the main page, login, editing, file uploads, `Special:Version` and all important extensions.
Updating through SSH
With SSH access, it is usually more reliable to update MediaWiki from the terminal. A general workflow looks like this:
# go to the site directory
cd /path/to/mediawiki

# make a database backup with your DBMS tools
mysqldump -u db_user -p db_name > backup.sql

# make a file backup
cd ..
tar -czf mediawiki-files-backup.tar.gz mediawiki

# download and unpack the new MediaWiki version
wget https://releases.wikimedia.org/mediawiki/1.43/mediawiki-1.43.5.tar.gz
tar -xzf mediawiki-1.43.5.tar.gz

# copy LocalSettings.php, images and required custom files
cp mediawiki/LocalSettings.php mediawiki-1.43.5/
rsync -a mediawiki/images/ mediawiki-1.43.5/images/

# after preparing the new directory, update the database
cd mediawiki-1.43.5
php maintenance/run.php update
Older MediaWiki instructions often used `php maintenance/update.php`; in newer versions, maintenance scripts are preferably run through `maintenance/run.php`. Always check the official instructions for the specific MediaWiki version before running commands.
Updating extensions
Extensions and skins should match the MediaWiki version. After updating the core software, update the extensions as well; otherwise the site may work incorrectly or show internal errors.
If an extension is installed through Git, update the branch that corresponds to your MediaWiki version. If the extension was downloaded as an archive, download a fresh compatible archive from the extension page. After updating extensions, it is often necessary to run:
php maintenance/run.php update
To verify the result, open `Special:Version`. This page shows the MediaWiki version, installed extensions, skins and basic environment information.
Author's note
MediaWiki is one of the most convenient platforms for building structured information websites. It is relatively easy to install, but a stable project requires regular maintenance: updates, backups, extension checks and attention to user rights. If you have questions about installing, updating or using MediaWiki, you can leave them on the talk page.
See also
References
- ↑ MediaWiki. MediaWiki.org.
- ↑ Installation requirements. MediaWiki.org.
- ↑ Installing MediaWiki. MediaWiki.org.
- ↑ All skins. MediaWiki.org.
- ↑ Extensions. MediaWiki.org.
- ↑ Short URL. MediaWiki.org.
- ↑ Upgrading. MediaWiki.org.